Lancia Beta 2.0 Water Pump Replacement -Lord of the "O" Rings
Lancia Beta 2.0 Engine in situ Water Pump Replacement
Simon M
5/19/20246 min read
Picking up from my last post I had left the Lancia with an engine that turned over and a coolant leak from behind the yellow belt cover of evil.
Looking in the Haynes manual they state that the water pump can be removed "with a little difficulty" with engine in situ. This is an understatement in my humble opinion.
I started by removing belt cover bolts and then removed the driver side metal cover which was covered in probably more than two decades of gunk. With the cover from the wheel arch removed I was able to access the water pump and pulley.
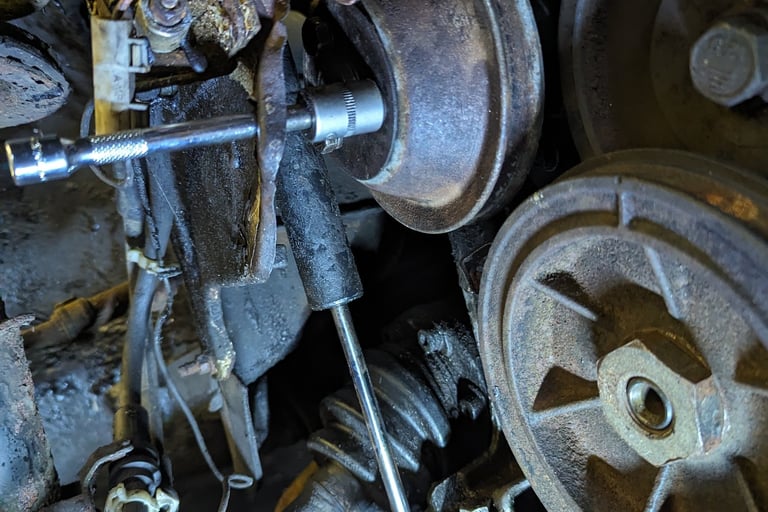
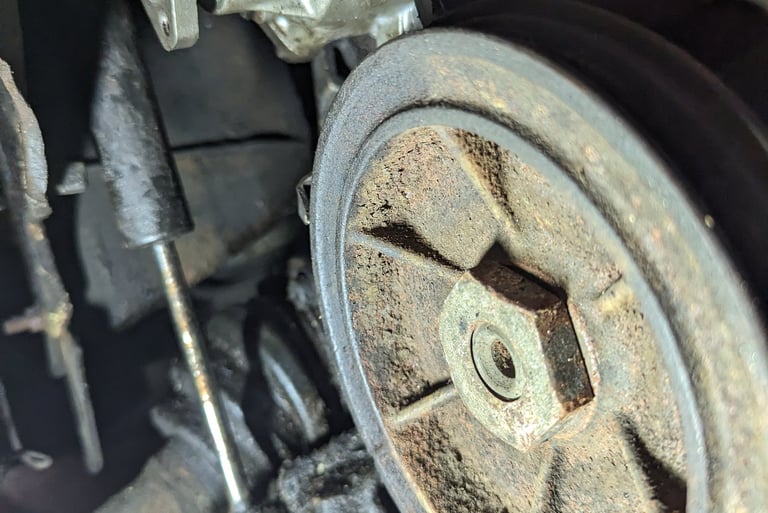
According to Haynes you should loosen all of the water pump pulley bolts with the alternator belt attached to help stop the pulley from turning. The alternator belt did nothing to help and after many expletives I realised that it was very difficult to to even get the socket on in the very tight space available between the inner wheel arch and the water pump.
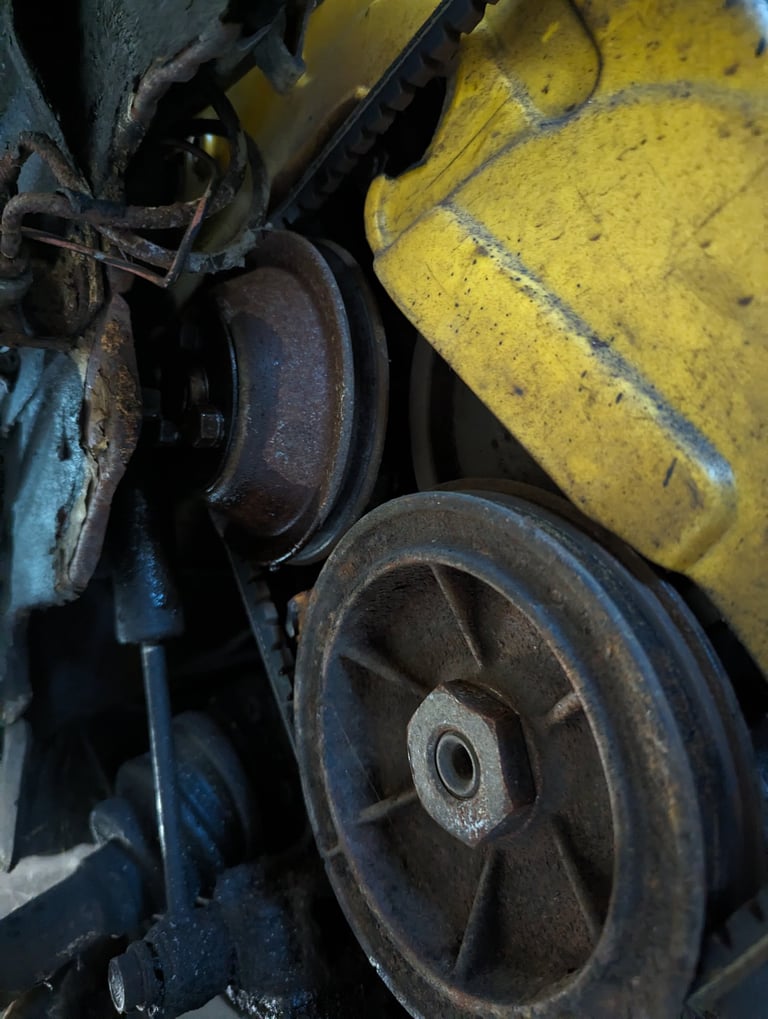

The gap between the metal inner wheel arch and water pump is probably an inch or two at best so even with a shallow socket it was very difficult to get a socket on the water pump pulley bolts. In the end I used a set of "wobble" extension bars to help me.
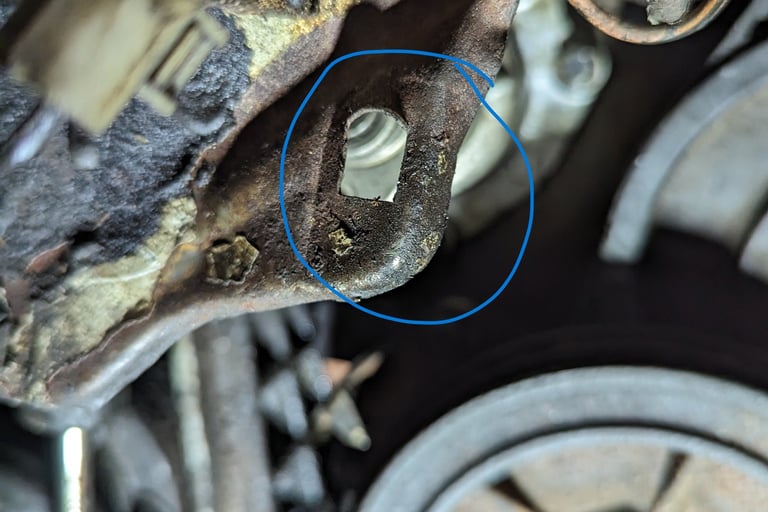
I put a shallow 1/4 socket onto the water pump pulley bolt and then connected that to a 1/4 extension bar through the circled hole ( which is intended to hold a plastic insert into which the metal cover screws ) with various adapters and extension bars to connect with a 1/2 ratchet. Having sprayed lots of WD40 on the offending bolt, I then used a pry bar to stop the pulley from spinning while loosening each of the three bolts one at a time. You will need to spin the pulley around to move each of the bolts to view through the hole until all three are loosened.
The pulley bolts are not completely in line with the helpful hole but the "wobble bars" allow enough movement to get the socket on squarely.
Then with the prybar in place to stop rotation I got all three bolts out and with some gentle persuasion from my hammer the pulley was off.

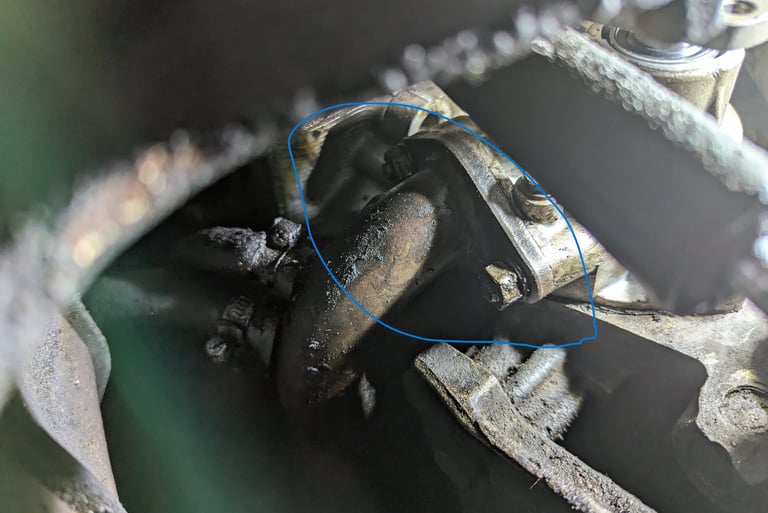
With the lower water rail removed the water pump bolts can be access with a small 1/4 ratchet and I inserted the 1/4 ratchet handle into a 1/2 long extension bar to the end to allow me more leverage and to make it easier to turn the bolts quicker.
Two of the bolts are longer and it takes time to turn the bolt enough to release it from the engine block. My ratchet with extension handle contraption really helped in the tight space and reduced the time and effort it took to get all of the bolts out.
With all of the bolts removed I was able to release the lower water rail from the studs using a pry bar and then extract the water pump. I cleaned up the face of the engine block with a razor blade to remove some bits of gasket that were stuck to the block in preparation for the new water pump.
With the engine block cleaned up I then turned to the lower water rail flange. The Haynes manual states that the 'O" ring should be replaced . The issue was that I could not see any groove for an O ring not to mention the O ring itself. I sprayed lots of WD40 on the flange and used a wire brush to to reveal the O ring. After some elbow grease I could see the ring which was completely flat in the groove and I used a small screwdriver to break the ring and remove it from the groove.
I then used the old ring which was in one piece thankfully to size up a new ring. I was able to find a suitable o ring in a set made by Hilka. When I pressed the O ring into the groove on the water rail flange it would fall out as soon as I tried to get the water pump in place. This was annoying as once the O ring fell out you had to manipulate the water pump profusely to get it back out in order to get the ring back in position and then repeat the twisting and turning to get the water pump back into position.
Again a flurry of expletives were released before I decided to dab a very small amount of gasket silicone to the o ring before seating it into the flange groove. The silicone helped it to stay in place while I offered up the new water pump.
I had used a paper gasket with a small amount of silicone gasket sealant on either side and after lots of twisting managed to get the water pump in place and the lower water rail onto the studs with the O ring still in position.
I then proceeded to bolt up the water pump and put the nuts on the lower water rail connection.
It took me about 4 or 5 hours to remove the water pump and prepare all surfaces for the new pump and then only about 40 mins or so to fit the new pump and tighten up everything.
I cleaned both the engine cover and the water pump pulley with degreaser, a wire brush and a scraper and put them aside.
I refilled the coolant system with water to check for leaks and left it overnight to see if there were any issues. I wanted to make sure there were no leaks before putting back the water pump pulley and reinstating the alternator belt with a new one from my local motor factor.
Thankfully the coolant system showed no leaks overnight and next time I will be flushing the whole system before adding fresh coolant.
The plan for next time is to add fresh petrol and get the car started, flush the coolant system and then refill the whole system with fresh coolant.
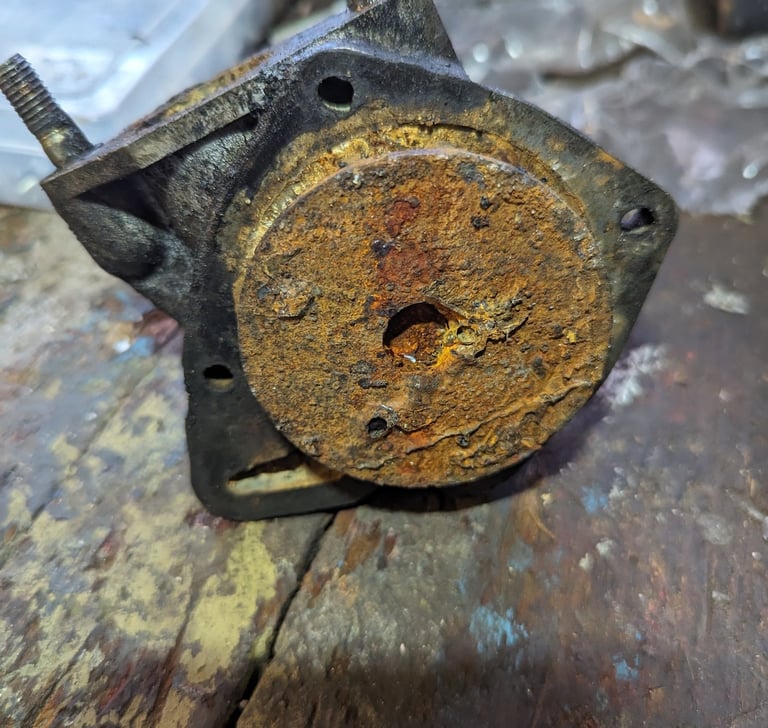
The old water pump was a mess and I could see lots of corrosion on the pump itself, in the water rail and engine block. The flush should help remove some of this.

This was quite a fiddly job due to the access available and the age of the nuts and bolts we were removing but this should help the engine as the old pump was dead. The water pump had a lot of movement in it and as you can see the impeller was completely filled with rust. The new water pump I purchased from AE Car Italian Parts came with the studs only and the O ring was not included so it is essential to have the O ring to hand if doing this job.
Some of the purists will say that the hole I used to get my extension through is now a bit elongated but that is a minor issue in the grand scheme of things and I am sure I can do something to find an alterative fixing point for the cover in the wheel arch to be refitted.
I was pretty happy with the job despite the time it took and we move one step closer to getting the engine running.


I then moved on to the water pump bolts and the nuts for the lower water rail which again were all doused generously in WD40.
There is also the vibration damper connected just in front of the water pump, this was loosened to allow a few more millimetres of space for a ratchet.
The water rail nuts were covered in stubborn gunk and they were the next things to be removed. There is a rubbery panel from which the track rod end for the steering comes out into the wheel arch and I pushed that back and gained access to the nuts (shown circled in image below) which were removed with some patience and more expletives.
